How to take a long exposure
Long exposure photography has become quite popular. Look it up on Instagram and you’ll see almost 5 million people have used that hashtag and its many other derivatives. It’s popular for good reason because it has so many uses. Some you may not know of. It’s a topic I could write a small book about, but I’ll try to get the basics across in this post. I’ll also talk about when, I believe, you shouldn’t use a long exposure.
So what exactly is a long exposure? Well, to me, a long exposure is using a shutter speed slow enough to cause anything moving in the scene to create a motion blur. This is why long exposures are also known as slow shutter or lazy shutter photography. You can get different results depending on how long you keep the shutter open.
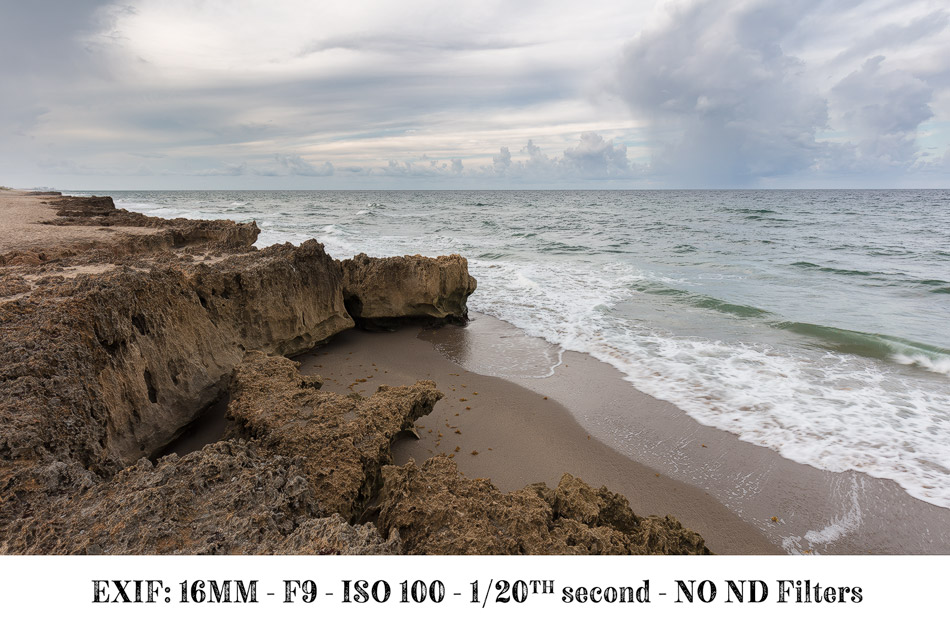
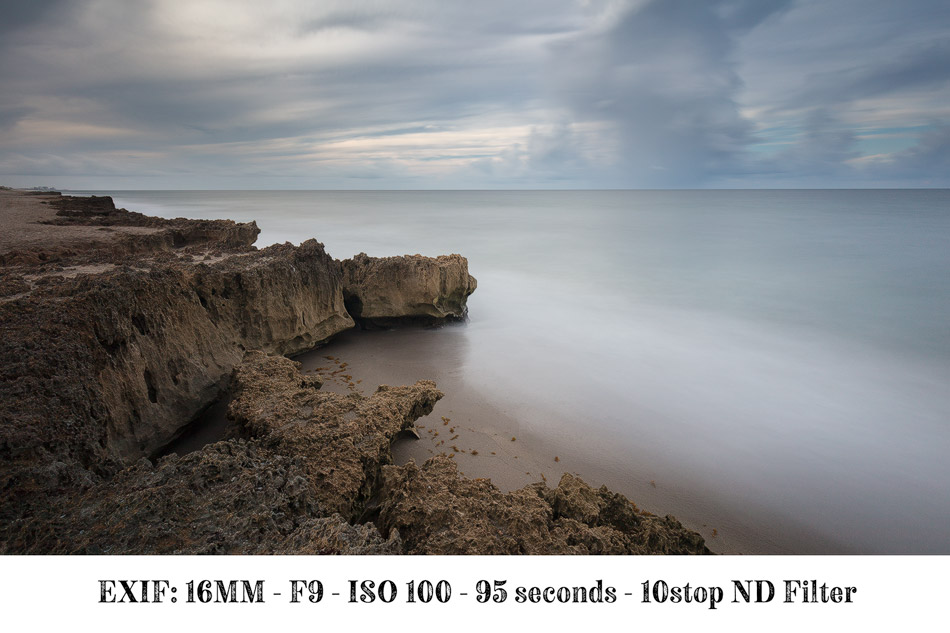
Click the thumbnails below to see how slowing down shutter speeds gives different effects and moods.


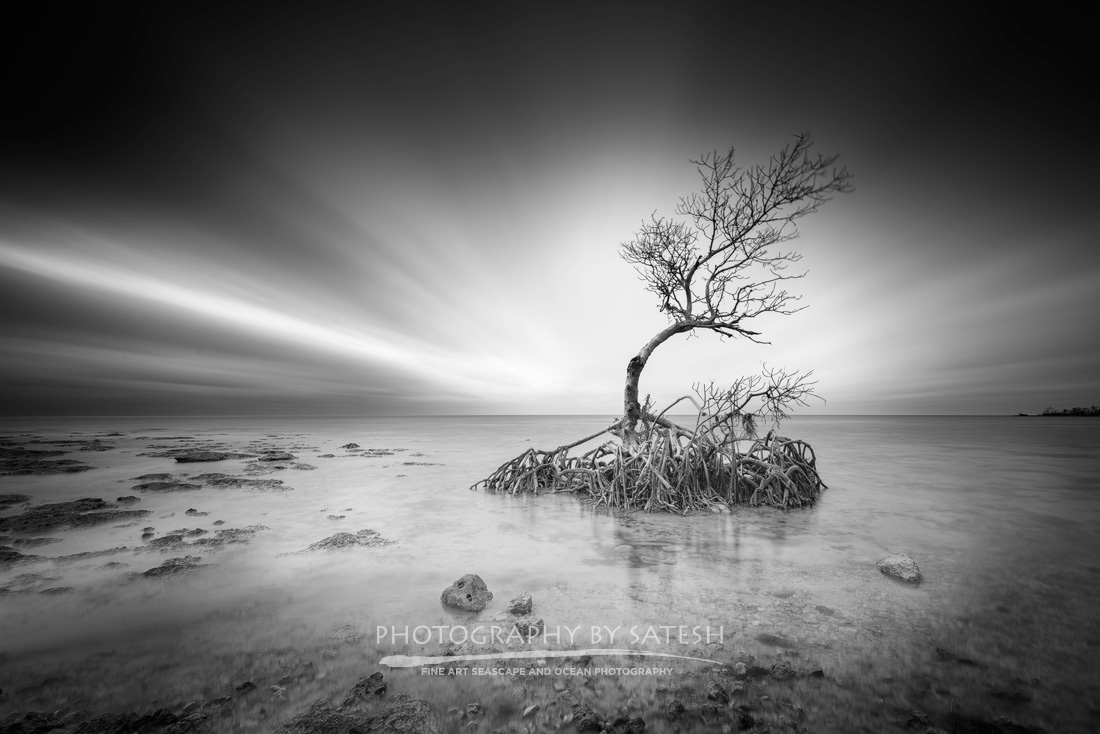
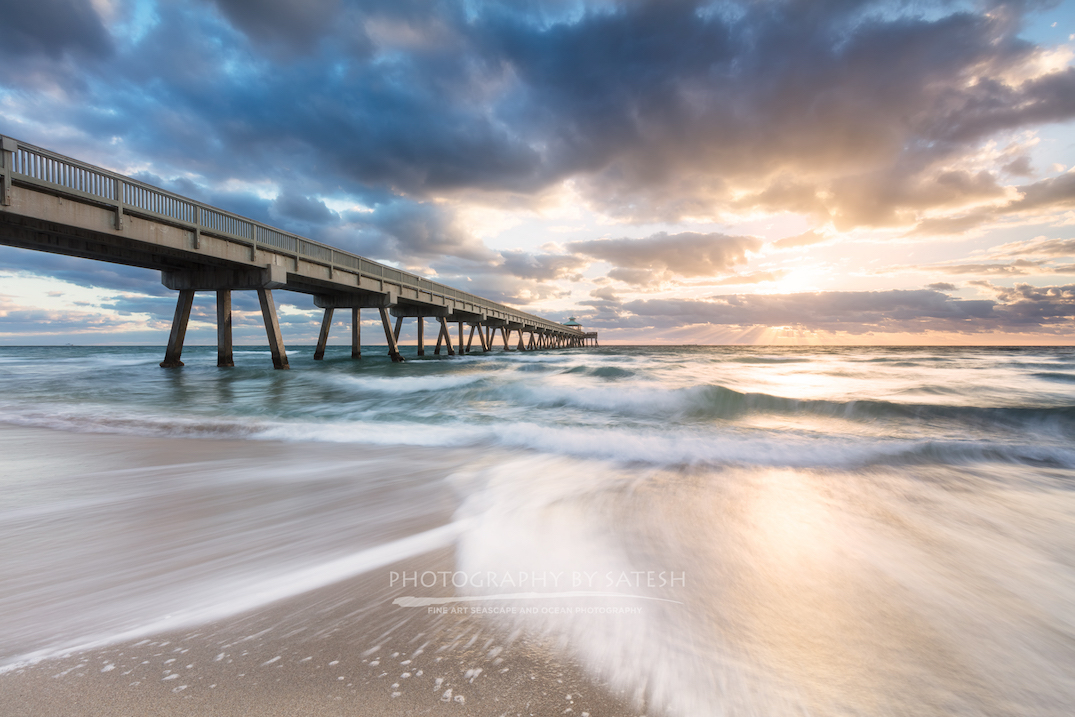
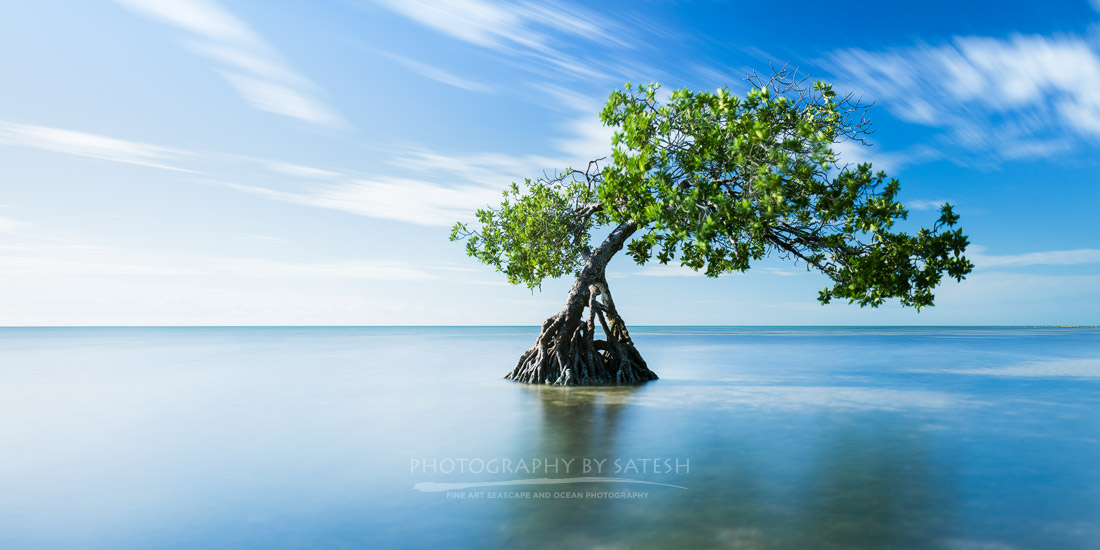
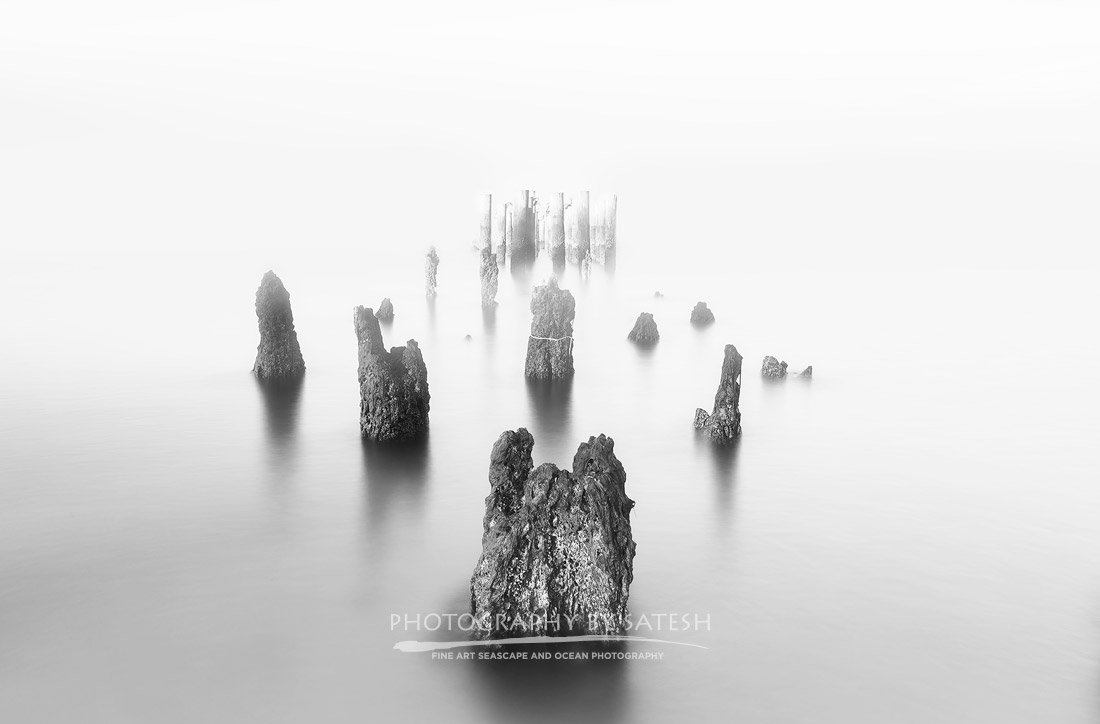
I love using long exposures in my landscape photography. About ninety-nine percent of my photos were shot with a shutter speed of 2 seconds or higher. I believe the longest I’ve kept my shutter open has been 6 minutes (360 seconds). The thing I love most about long exposures is the drama it can add to a photograph. I also love how I can use it to convey time and movement. A long exposure can transform an angry ocean into a gentle mist, or make moving clouds zoom across the sky just by keeping the shutter open for seconds instead of a hundredth of a second.
Here are some of my long exposures that show how different shutter speeds can create different effects and emotions.
The one use you may not know about is that you can use it to help make people/traffic disappear from scenes. For instance, if you want to photograph a popular tourist location and want to reduce the amount of people you can just use a long exposure.
Tools for taking a long exposure
So how is it possible to keep the camera’s shutter open without overexposing the photograph? Well there are a few ways depending on the time of day and the lightning conditions. Before I get into that, you will need a few tools that will help. First, a tripod is necessary to avoid blurry photos caused by any camera movement during the exposure.
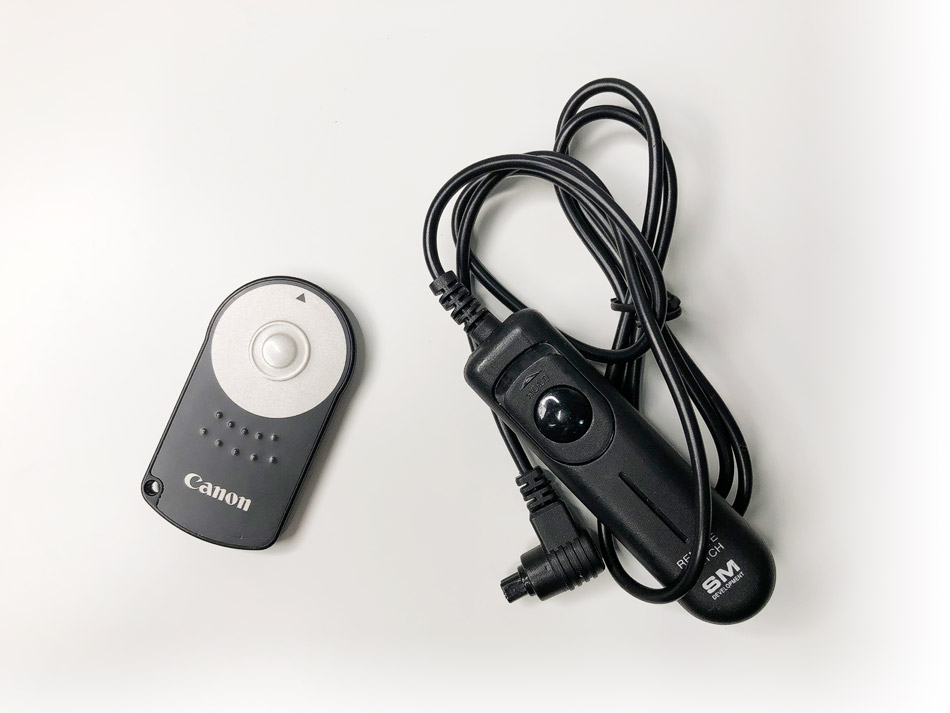
Second, a wired or remote shutter release is helpful and definitely needed for exposures beyond 30 seconds. Newer cameras have the ability to set a timer I find it takes too much time to setup, especially if the light is changing quickly.
Here are 2 different types of remote shutters. One wireless and one wired. Most wired remotes don’t require the use of a battery.
The last item(s) that will help you achieve longer shutter speeds are ND filters. ND stands for Neutral Density. The simplest way to describe these filters are sunglasses for your lens. They come in a few densities or darkness levels that will reduce the amount of light passing through the camera lens. The word neutral is used because the filters don’t add any kind of color cast, at least they aren’t supposed to.
Once you have these tools you’re ready to begin shooting long exposures. So let’s get started.
Techniques for taking long exposures
The first method is fairly simple and all you’ll need is a steady tripod and a low light scene like the beach 20 minutes before sunrise. We’ll begin in manual mode and set the ISO to 200, and then set the aperture/fstop to f9. I normally keep my fstop between f9 and f13 because I find my photos are sharpest at those numbers. Next, activate LiveView so you can see the scene on the back of your camera’s LCD. It probably looks very dark, but that’s ok. Now, turn the shutter wheel counterclockwise until you begin to see the scene become properly exposed. Your shutter speed should be somewhere between 15-30 seconds. Once you’ve done that, go ahead and click the shutter button.
A quick tip to remember is make sure you don’t touch the camera during the exposure and I also suggest putting your camera on a 2 second timer to avoid camera shake. Another important tip to remember is to have your histogram on when you are reviewing your image. Don’t rely on the lcd when checking your exposure. Once the light gets brighter you can raise your fstop to f16 if you like to maintain a slow shutter, but I don’t recommend going beyond that unless you have no other option. By now, the sun is on the horizon and there is a lot of light, and it’s getting harder to get shutter speeds above 2 seconds even with your aperture maxed out and the ISO lowered to 100. In order to achieve longer exposures during this time you will need to bring out the ND filters.
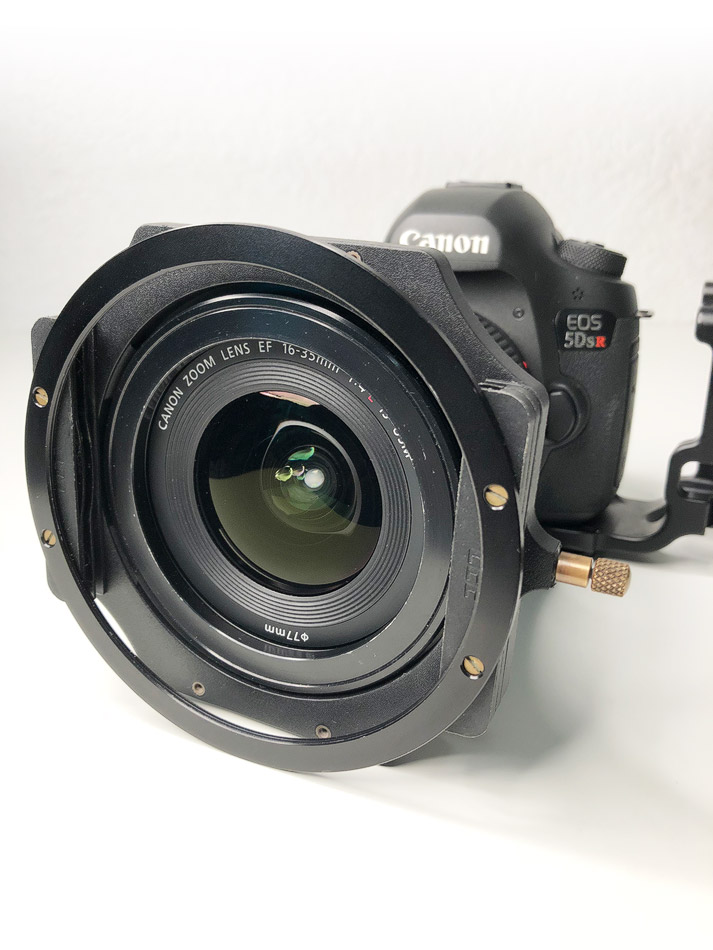
Like I mentioned earlier, ND filters vary in how dark they are. Some will reduce the light hitting your sensor by 3 stops, while there are others will reduce it as much a 15 stops. These filters are placed in front of your lens either by purchasing a filter kit or by purchasing ones that screw directly on to your lens.
The LEE Foundation kit attached to my Canon 5DS R
Using Neutral Density Filters for long exposures
I started out with the screw on type but encountered vignetting when placed on ultra-wide angle lenses, especially if I wanted to stack them. Eventually, I bought a filter kit and have been using it for over 5 years now.
Let’s say you’re still shooting a seascape in bright conditions and you want the ocean to appear flat and misty. By putting a 10stop ND in front of your lens, you will be able to get your shutter speed to 30 seconds or higher, which will give you the results you’re looking for. One important tip to remember is to always set and lock your focus and composition before putting on ND filters, especially the 10stop because you won’t be able to see thru your lens. So I just mentioned shutter speeds higher than 30 seconds and you’re probably saying, my camera doesn’t go beyond that. Well it does, and it’s time to bring out the remote shutter release.
I am a Canon user so if you don’t shoot Canon you probably need to refer to your camera manual. Depending on your camera model you need to look for BULB mode. On my DSLR I just turn my mode dial to B.
Bulb mode is just like shooting in manual mode. You set your fstop, ISO, and shutter. But now you have the ability to keep your shutter open for as long as you want with your remote shutter. Let’s go back to the example where the slowest shutter speed you could get without an ND was 2 seconds. You just place a 6stop ND on the front of your lens. That 2 second exposure just became a 2 minute exposure. If you’re quick with math, great, but I use an app that calculates the time for me.
The LEE Filter APP.
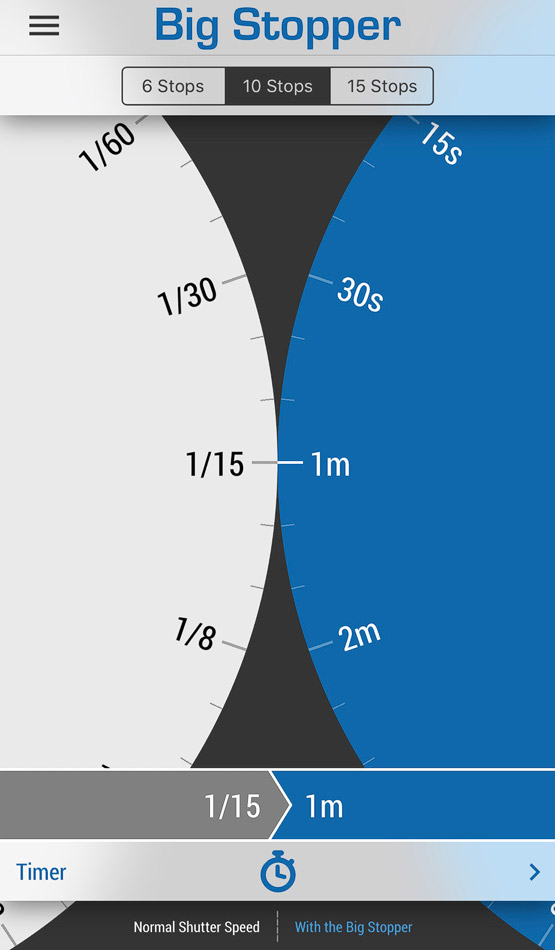
Now with your camera in Bulb mode just press your remote shutter and don’t release until 2 minutes later. Normally, I just look at the top of my camera to check the time, but most apps that calculate exposures for you will also come with a timer that will let you know when to release the shutter.
You now have some basic knowledge of how to start taking long exposures. It’s best to go out and practice so it becomes second nature. Experiment with different shutter speeds starting at 1/8th of a second. You’ll begin to see different results and what fits your style or vision. You may run into some issues but it’s ok because it’s a learning experience. I’ll now insert a plug for my one on one workshops. Book a session and we will get those issues resolved. I’ll even take 20% off if you mention this post.
I hope you were able learn something from this post. In part two I’ll be discussing some mistakes I’ve made with long exposures. Some technical and how I learned when not to take one. Don’t forget to subscribe here to get more free tips and guides like this.