The Best Camera Settings to Improve your Landscape Photography
When it comes to landscape photography, you don’t need to have the latest camera with all the fancy bells and whistles to get great shots. Most of the features on today’s digital cameras are just plain gimmicks in my honest opinion. Sure it might be handy to have a camera with Wi-Fi and a touch screen, but at the end of the day, they won’t improve your photography. When you first unbox your DSLR, it is setup to give you a “properly exposed” photo without much thought or effort from you. So in this article, I want to share what camera settings I changed that will give you the sharpest and cleanest image you can get out of your digital camera.
Since I have always shot with Canon cameras, I will be using one to illustrate which settings to change. Don’t worry if you use another brand because the terminology will be the same or similar, but you may want to have your manual handy just to help.
The very first setting you need to change might scare some of you, but trust me when I say, “Shooting in manual is easy.” So go ahead, take a deep breath and turn that dial from AUTO to Manual. It’s okay to exhale now. Also, just a quick heads up that I will not be discussing metering modes and white balance. But if you must know, I set my white balance to auto and have my metering mode set to evaluative.
The remaining settings to change are accessed using the MENU button.
Settings to get maximum image quality:
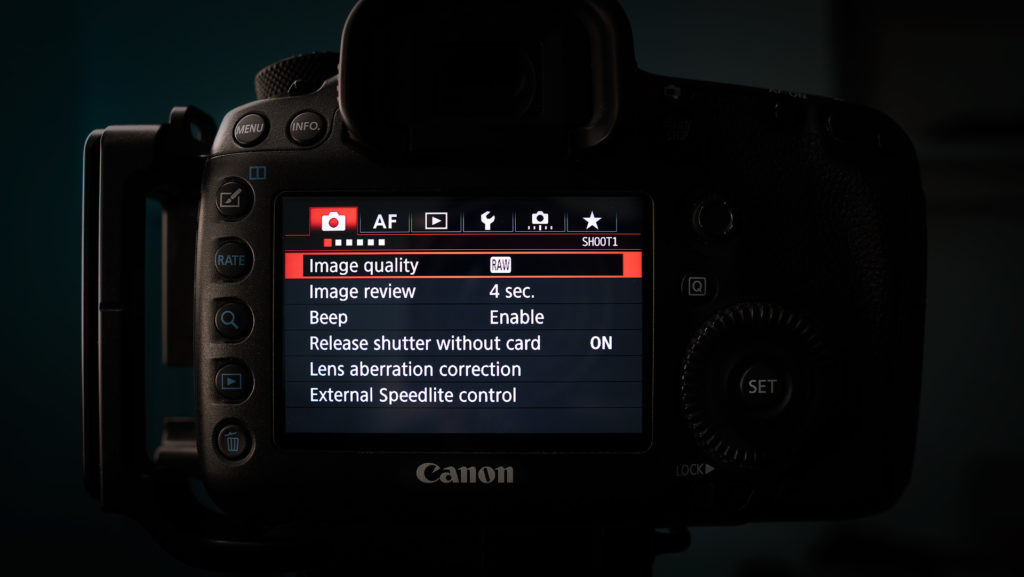
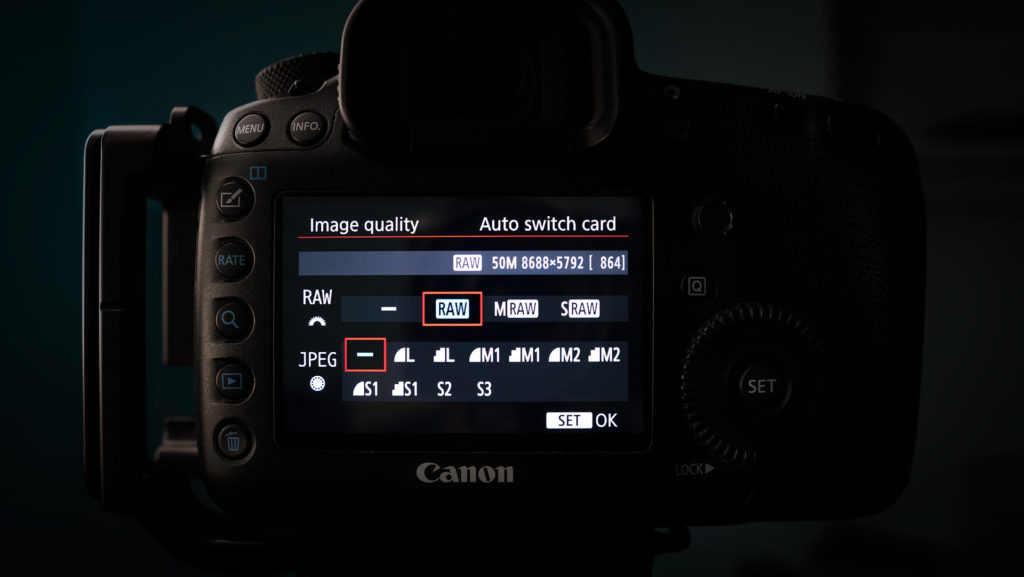
The second setting to change is the IMAGE QUALITY. You can access this setting by pressing the MENU button and it should be the first setting highlighted. By default, it is set to take large JPEG files, but you want to change that to RAW files.
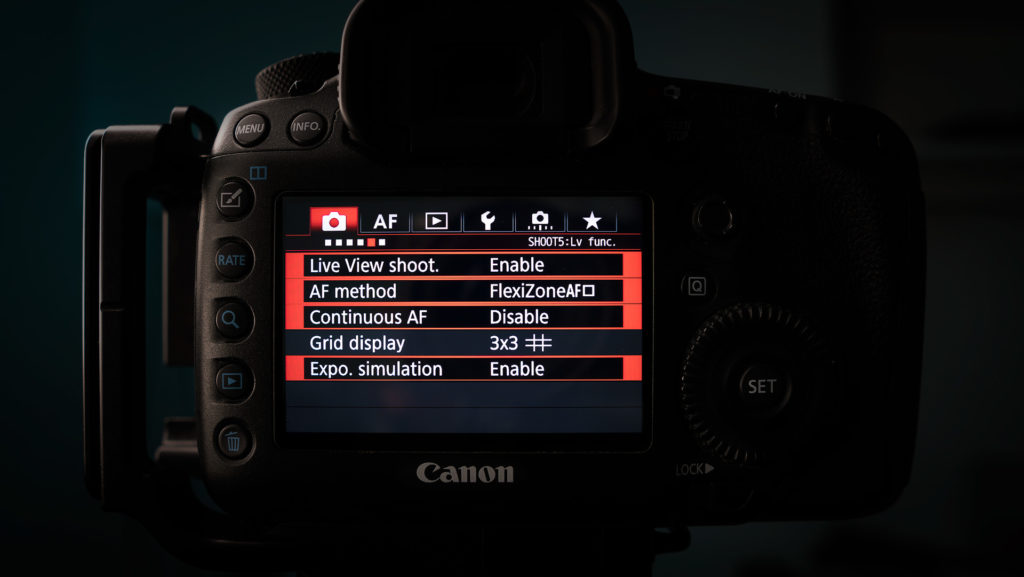
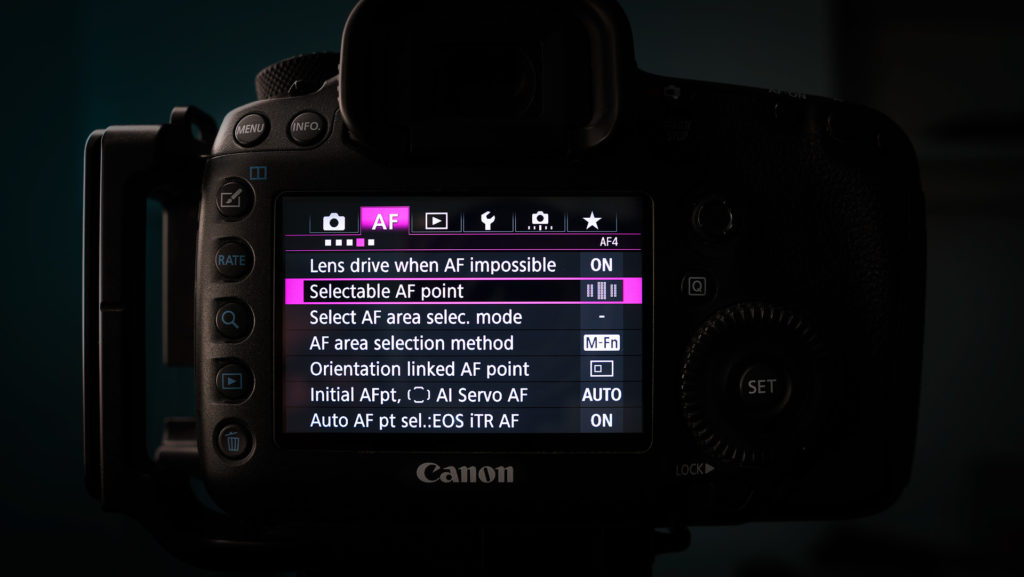
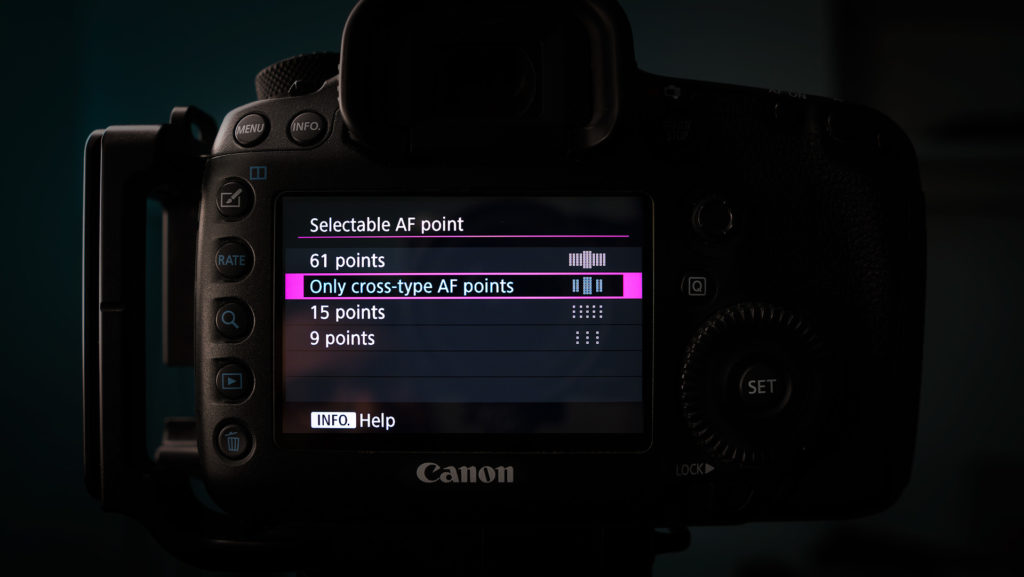
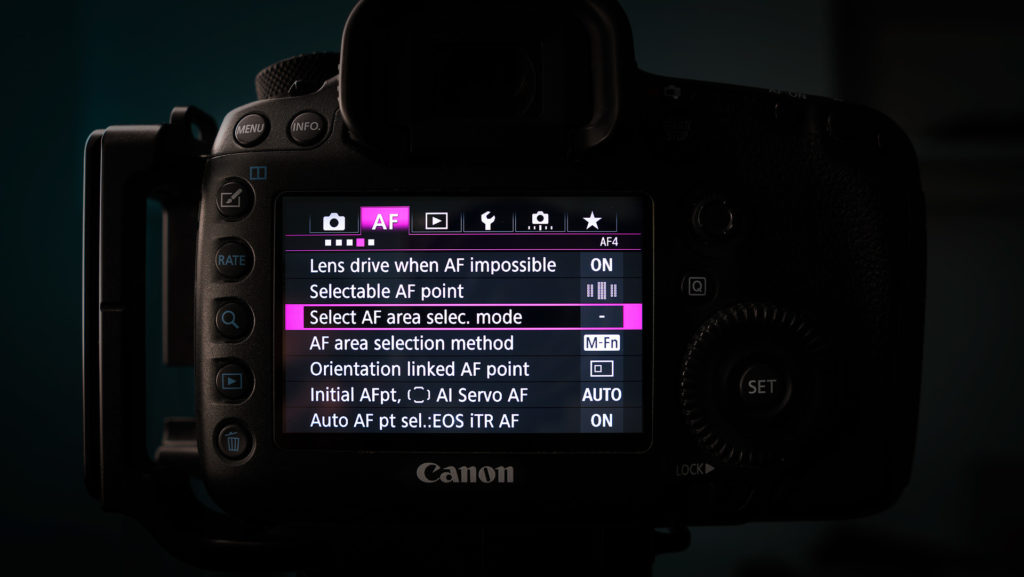
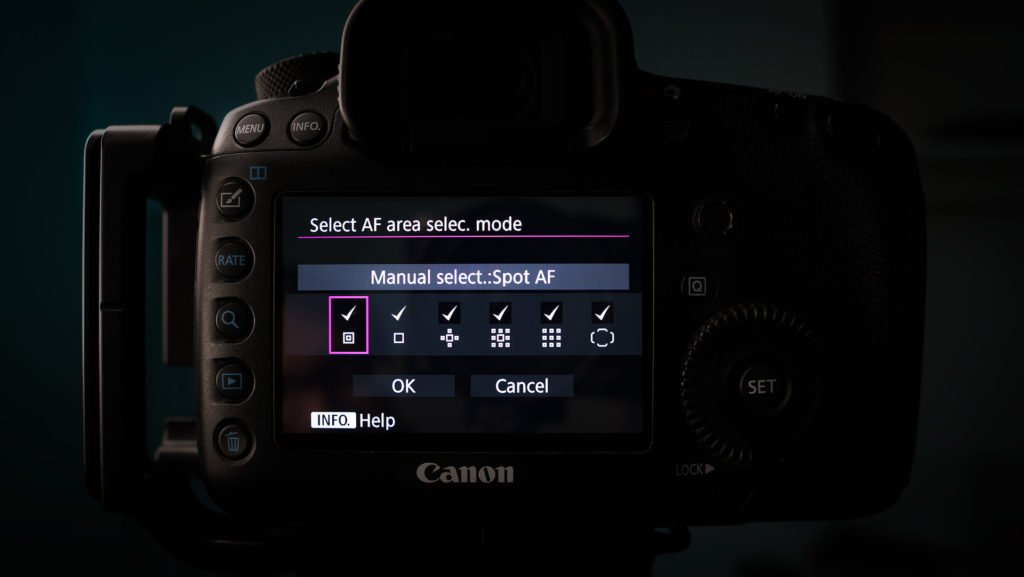
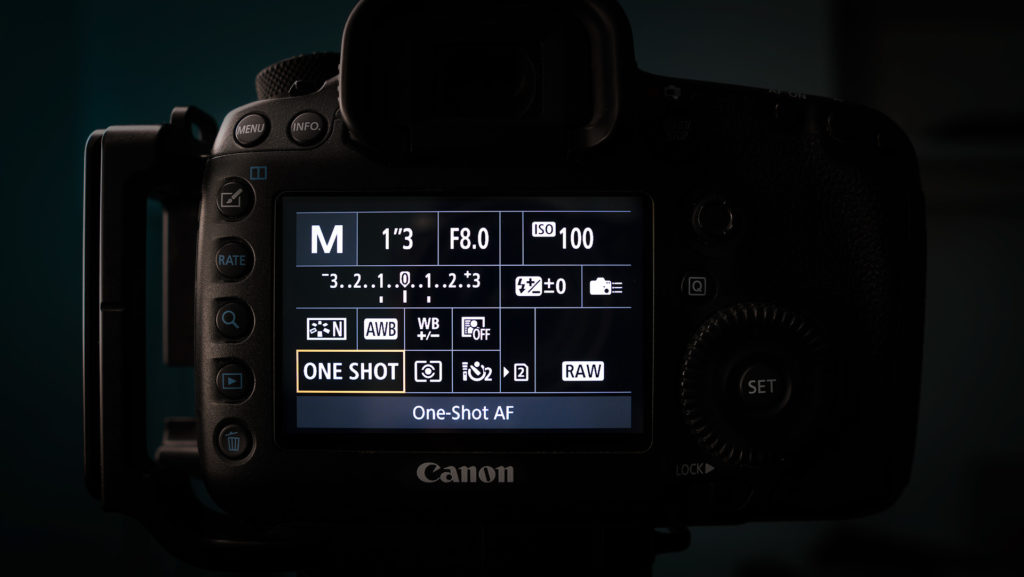
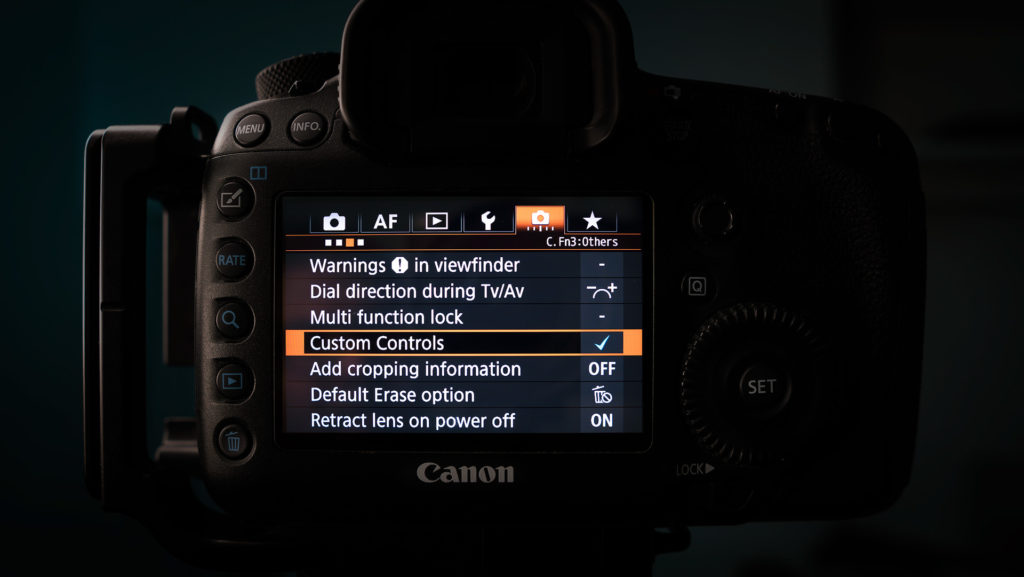
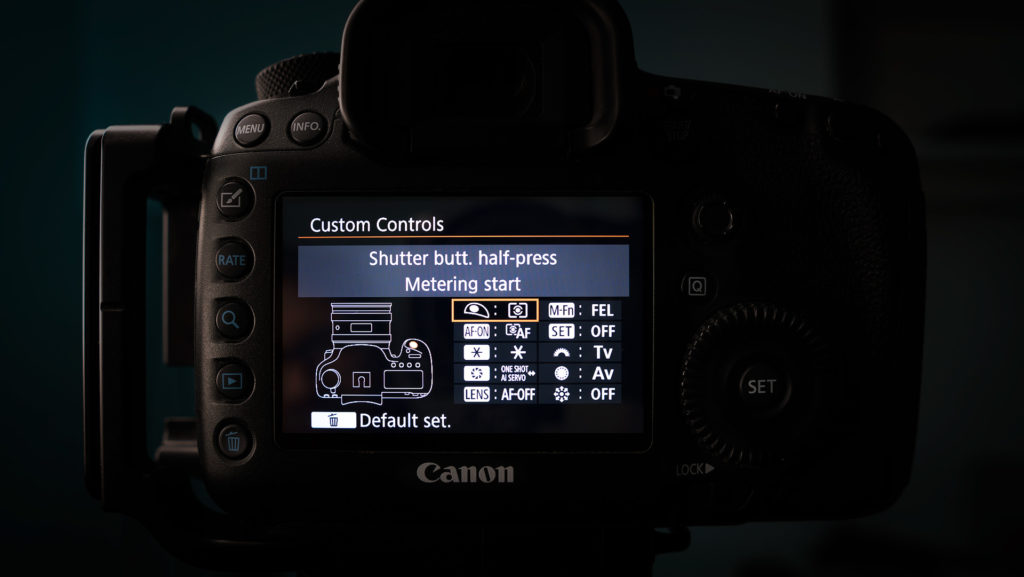
See pictures below of how the correct settings should be.
For those of you that don’t have Adobe Lightroom, Photoshop, or any other program that can edit RAW files, you can skip this step. I do strongly recommend getting either program because they can take your photographs from good to amazing. The main difference between the two file types is RAW files produce higher quality images. They contain all of the image data from your camera’s sensor, which gives you more editing capabilities. On the other hand, JPEG files are compressed and processed by your camera. They don’t keep any of that important information from the sensor and you won’t be able to edit the photo much further. The only drawback to shooting in RAW format is that the files are much larger, so your camera card will fill up faster.
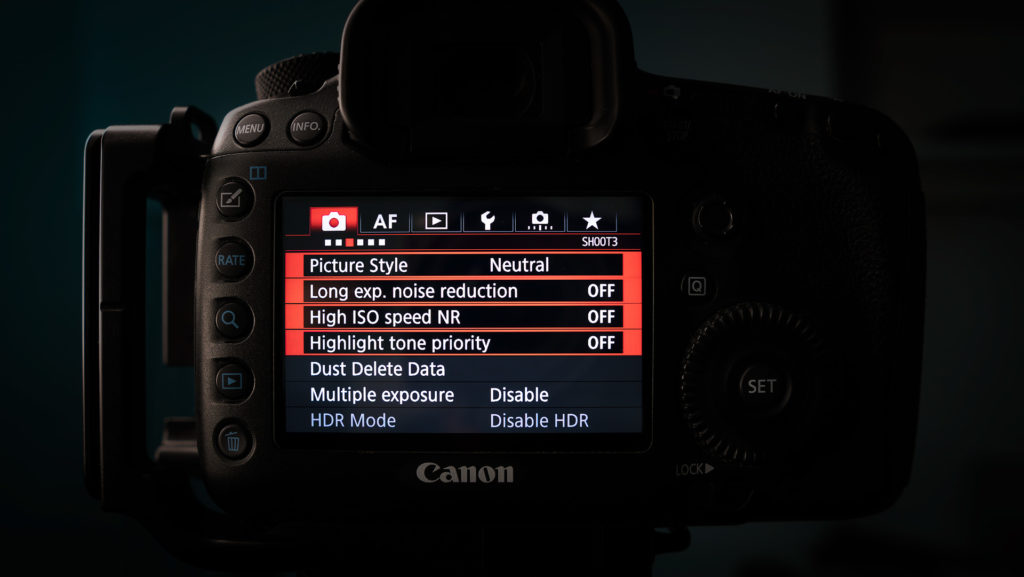
The next four settings are turned ON by default to help improve the quality of JPEG files, but since we are shooting RAW, we will turn them OFF.
- PICTURE STYLE. This setting applies preset or user defined effects to JPEG files. Set this to NEUTRAL. Even though we are shooting RAW, the picture you see on the back of your LCD is based on the picture style. We want to see a true representation of what our RAW file will look like, which is always flat and neutral.
- LONG EXPOSURE NOISE REDUCTION. Having this setting ON is a waste of time if you are shooting RAW. So go ahead and turn this setting OFF. The reason it’s a waste of time is because it will take double the time to write the file to your camera card. For example, if you took a 3 minute long exposure, the camera will automatically take a second 3 minute long exposure and then combine the two to reduce the noise or “grain” in the photo, thus taking double the time (6 minutes) to get one image. You can easily reduce noise in Lightroom with just a few clicks as long as you shot in RAW.
- HIGH ISO SPEED NOISE REDUCTION. This setting is very much like the previous, and only effects JPEG files. Therefore we will turn it OFF.
- HIGHLIGHT TONE PRIORITY. This setting is very much like the previous, and only effects JPEG files. Therefore we will turn it OFF.
Settings to help with exposure and composition while shooting:
- LIVE VIEW SHOOT. ENABLE this setting. Live View allows you to see what your lens is pointed at on the back of your LCD. With this function enabled, you are able to zoom in up to 16x on your subject to set focus. And best of all you can see what your exposure will look like before you click the shutter, but you have to enable the next two settings.
- AF METHOD. Set to FlexiZoneAF. When set to this function, you are free to zoom in up to 16x on your subject to set focus either manually or with autofocus.
- EXPOSURE SIMULATION. ENABLE this setting. This setting allows you see what your exposure will look like in LIVE VIEW before you click the shutter.
- GRID DISPLAY. This setting is completely optional. All it does is overlay a rule of thirds grid on your LCD while in Live View.
Settings to help achieve sharp photos:
- SELECTABLE AF POINT. Choose only Cross-type AF Points. This setting will vary on different cameras, but by choosing this setting it will give the best results when using autofocus.
- SELECT AF AREA. Turn ON all of the options but the most important one for landscape photography is Manual Select:Spot AF. This allows you to choose a single point to focus on using autofocus. You can see these focus points thru the viewfinder.
- USE BACK BUTTON FOCUS. This function is set in custom controls. Go to custom controls, and assign the AF-ON button to AF Start. By using back button focus, your focus will remain locked. Your camera will not attempt to refocus every time you press the shutter button. To refocus, simply press the AF-ON Button again.
- SET AUTOFOCUS TO ONE SHOT. You can see this setting from the Quick Menu (Q Button). The other options are AI FOCUS and AI SERVO, which are designed for moving subjects such as wildlife.
I hope you found this article helpful. If you have any questions, please leave them in the comments section below.
If you want more FREE tips, don’t forget to subscribe. Also, if you want to improve your photography, I offer one on one workshops where we practice out in the field in real world situations. Post processing classes are also available. Mention this blog post and I will take 20% off.
